
[PROTOCOL 002]: Gate Removal — The Precision Cut Protocol
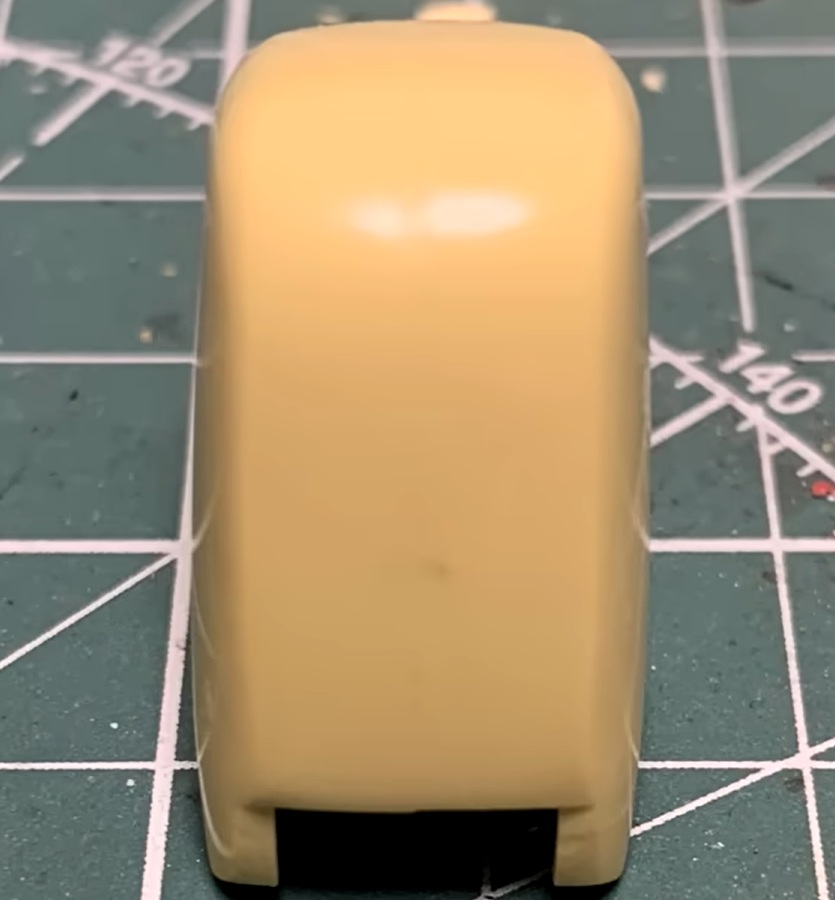
[COMMAND OBJECTIVE] The parts are smooth and glossy.
This protocol guides the Operator in mastering the “Seamless Cut” technique to effectively remove the gate marks (runners) from the kit parts. The goal is to prevent stress marks (whitening) or damage to the part surface, ensuring the model meets the Adeptus Fabrication standard from the outset.
[TACTICAL GEAR VETTING] Recommended Tactical Gear
The right tools are fundamental for executing precision fabrication. We strongly recommend the following equipment:
| Gear Name | Gear Image | Type | Function Description |
|---|---|---|---|
| Double Blade Nipper |  | Coarse Cut / Initial Separation | Used in Phase One to safely detach the part from the runner. |
| Single Blade Nipper | 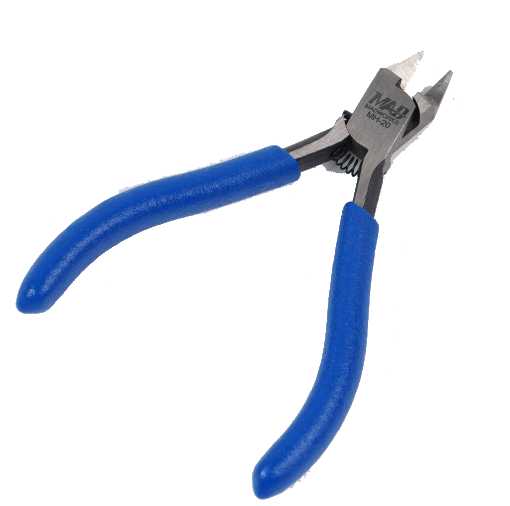 | Fine Cut / Flush Cutting | Used in Phase Two for near-perfect flush cutting of the remaining gate nub. Crucial for preventing stress marks. |
| Hobby Knife | 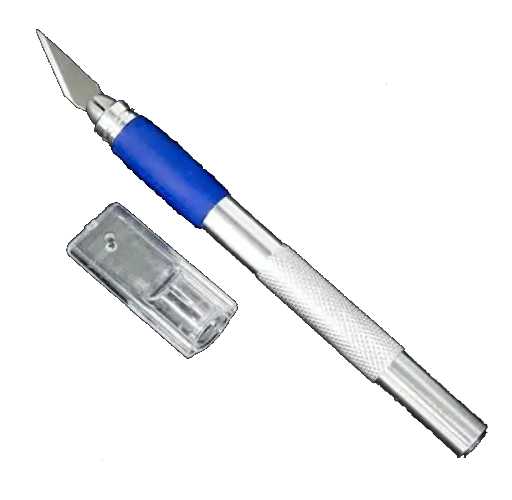 | Final Surface Treatment | For trimming extremely tiny gate residues or smoothing uneven surfaces. |
[PROTOCOL FLOW] The Precision Cut Procedure
Gate removal is not a single operation but a “Two-Step Cut Protocol” that requires precise execution.
STEP 1: The Initial Separation (Coarse Cut)
Execute this step using the Double Blade Nipper.
- Operation Command: Do not cut directly next to the main part.
- Cutting Point: Always cut the gate, leaving a $2 \text{mm}$ allowance away from the part connection point.
- Objective: To prevent the nippers from applying excessive stress to the part during the cut, thereby avoiding stress marks (whitening).
STEP 2: The Final Approach (Fine Cut)
Switch to the Single Blade Nipper for this step. This is the core phase for surface perfection.
- Operation Command: Place the flat face (non-beveled side) of the single blade nipper flush against the surface of the part (i.e., against the $2 \text{mm}$ allowance left in Step 1), cutting perpendicular to the gate direction.
- Cutting Point: This cut should be as flush to the part surface as possible.
- Objective: The single blade design provides a cleaner, flatter cut, minimizing shearing stress and achieving a Seamless Cut.
STEP 3: Final Gate Sealing (Surface Treatment)
For areas with minor protrusions or cutting marks, use a hobby knife or sanding materials for final treatment.
- Hobby Knife Treatment:
- Lay the knife blade flat and gently scrape the remaining plastic protrusion.
- CRITICAL: Avoid using the knife tip to cut vertically, as this easily leaves score marks or pits on the part.
- Sanding Treatment:
- Start with a lower grit (e.g., 400 grit) and gradually transition to higher grits (e.g., 800, 1000 grit and above) for smoothing.
- Ensure a consistent direction to keep the treated area flat and uniform.
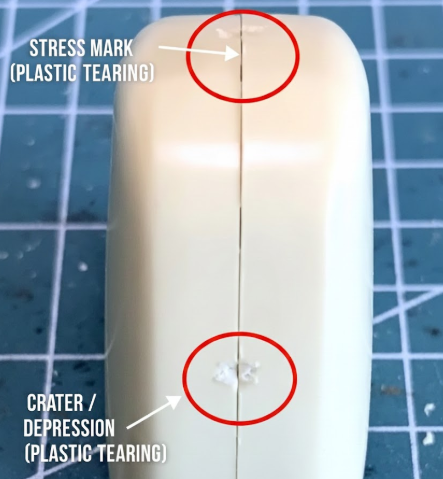
[FAILURE ANALYSIS] Common Faults & Rectification
| Failure Mode | Root Cause Analysis | Corrective Action |
| Stress Mark (Whitening) | Single-cut operation performed; dull or incorrect tools used, leading to excessive stress on the plastic. | The Two-Step Cut Protocol is mandatory; invest in a quality Single Blade Nipper for fine cutting. |
| Surface Pit (Crater / Depression) | Cutting tool placed too close to the main body, causing the plastic to tear or deform. | Ensure sufficient allowance is left during the coarse cut; the fine cut must be sharp to ensure a clean shear rather than a crushing squeeze. |
Every model kit is a piece of precision engineering. Gate removal is the cornerstone of all fine fabrication. A perfect start is the first step toward a successful HANGER display.Not sure how to get started? Please refer to the section on basic part cutting.
[END PROTOCOL 002]


![[PROTOCOL REPORT]: Deconstructing the Gunpla Phenomenon](https://plamoforge3d.com/wp-content/uploads/2025/12/wtsgunplaT-300x164.jpg)
![[PROTOCOL 001]: Part Cutting — The Safe Separation Protocol](https://plamoforge3d.com/wp-content/uploads/2025/12/001-300x172.jpg)